NVIDIA Jetson Orin Nano: First Impressions & Initial Setup
First impressions and complete setup guide for the NVIDIA Jetson Orin Nano Developer Kit. Covers hardware assembly, SSD and camera installation, SDK manager troubleshooting, and remote access configuration.


In this story I want to share my first experiences and setup steps with the NVIDIA Jetson Orin Nano.
This marks the start of my journey with the Jetson and also AI workloads. During this journey, I will take you along my learning experience about running AI workloads, and just “getting into AI” in general. I will be sharing my experiences, learnings, challenges I encountered, and everything in between. For this first post, the focus will be on the hardware and setting up NVIDIA Jetson Orin Nano.
My inspiration for this journey and also for the NVIDIA Jetson Orin Nano was this LinkedIn post:

The author mentioned an AI model for detecting hardhats on construction sites running on an NVIDIA Jetson Orin Nano. I was immediately very interested in the idea, so I decided to get an Jetson myself and start playing around.
As of now, my experience with running my own/custom AI workloads is very limited, practically non-existent. I am not a professional AI or software engineer either. I am just very interested in the technology, want to explore, learn and have fun. Here are some ideas or thoughts I currently have (to give you some idea of where I currently stand and what to expect):
- How does object detection (boundary boxes) work?
- How do I define which objects to detect?
- How can I detect more complex things (e.g. a person holding up a specific finger)? One idea: Detect when I slouch in my chair
- How does retraining / continuous optimization of models work? How can I implement that?
What is the NVIDIA Jetson Orin Nano?
The NVIDIA Jetson Orin Nano is an compact embedded system designed to run AI workloads at the “edge” – meaning on devices out in the world, rather than centrally on (cloud) servers.
NVIDIA offers multiple devices within their Jetson platform, with Orin Nano sitting at the entry level. It is designed for AI workloads running in power-, size- and thermally-restricted environments. Think robotics or industrial applications.
It is important to consider that the Jetson Orin Nano itself is only a system-on-a-board, but most pictures and general mentions you find about it reference the Jetson Orin Nano together with NVIDIAs carrier board for it. The board provides diverse I/O possibilities for the Jetson, allowing easy connections via USB, DisplayPort, M.2 or GPIO to name a few.
I chose the Jetson Orin Nano because it seemed like a great way to get into the world of AI, running it on local hardware and playing around with different ideas. I didn’t get it especially for the idea of “edge” AI, but rather because it’s a dedicated device optimized for running these AI workloads. While this would also work on my Macbook for example, I found the idea of having this small dedicated device very interesting and fun, so I went that way. Combined with the pricing of 250$ (I payed 310€ here in Germany), it was a done deal for me.
Hardware Setup of the Jetson Orin Nano Developer Kit
Here are some hardware specs of the Jetson Orin Nano Developer Kit:
- 6-core Arm Cortex-A78AE CPU
- 8GB LPDDR5 RAM
- NVIDIA Ampere GPU with 1024 CUDA cores and 32 Tensor cores
- Up to 25W power consumption in MAXN mode
- Runs LLMs up to 8B parameters
Unboxing
Unboxing the Jetson was very unspectacular. The box has a clean an minimal design, and there is not much within the box:
- The NVIDIA Jetson Orin Nano
- Power adapter
- EU power cord
- US power cord
When ordering, I was not sure whether there would be an SD card included or not. I was planning on using an SSD anyway, but just be aware that there will be some form of additional storage required when buying a Jetson.
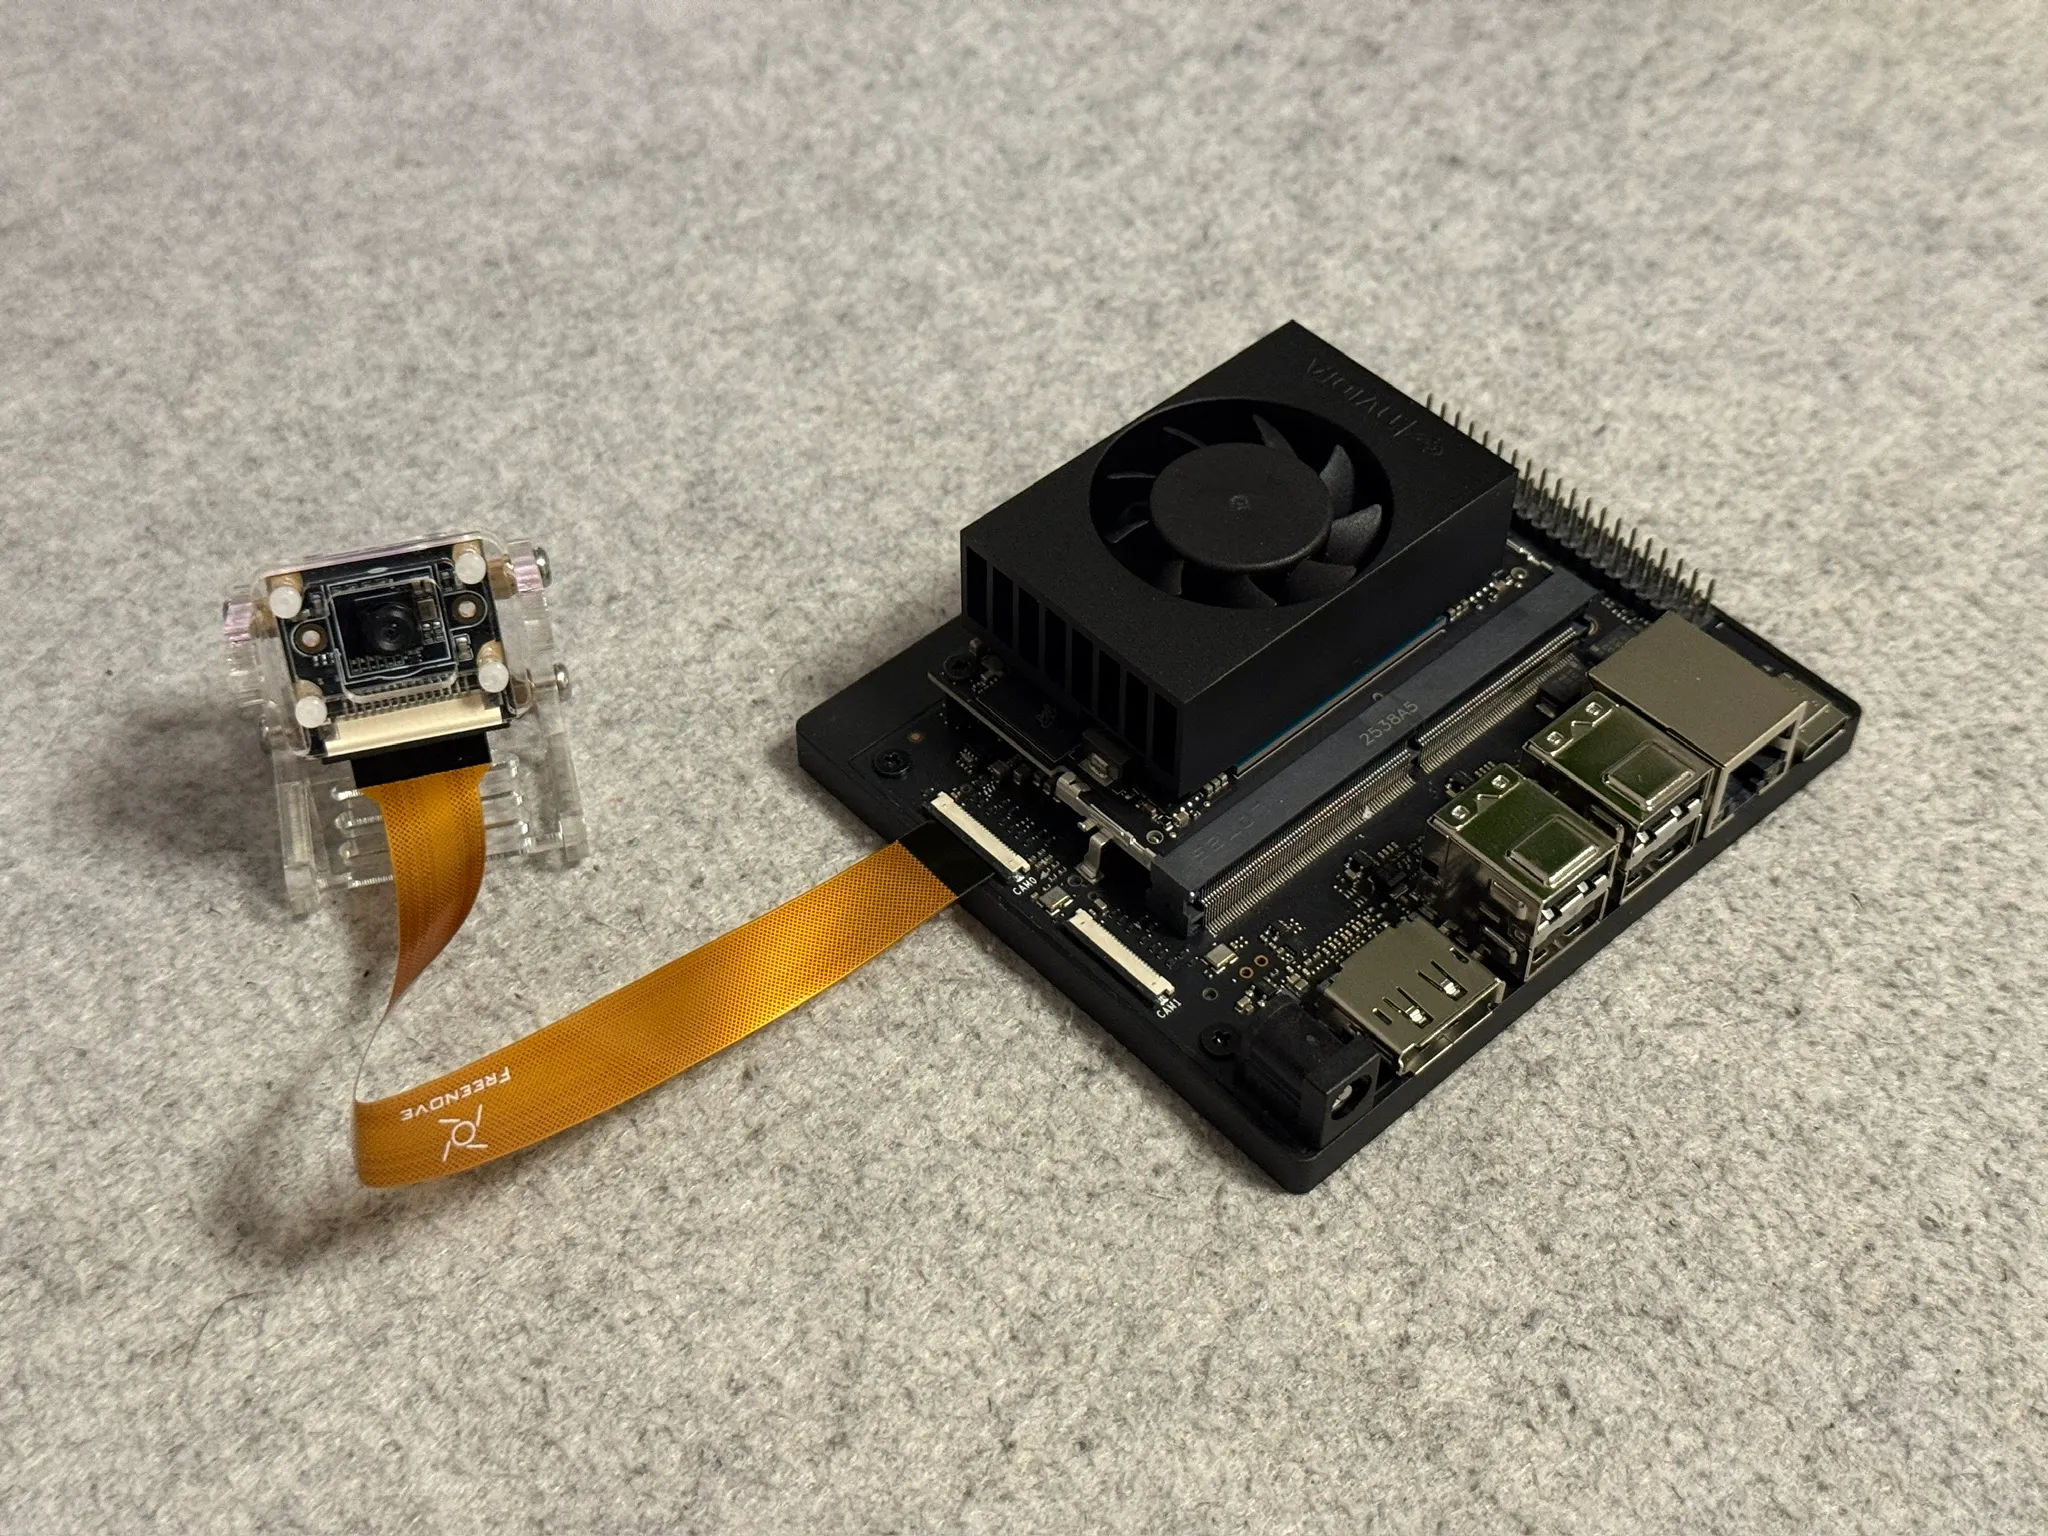
Camera
I plan to play around with vision capabilities, so I also needed an camera for the Jetson. After some research, I landed on the Freenove FNK0056 camera. While it doesn’t have the best quality ever, it seemed pretty affordable and good enough, at least for the start.
Some other reasons why I chose this camera are the supposedly integrated driver for the camera within the Jetson’s software, and the use of CSI. CSI seemed more interesting and “grown up” to me, so I wanted to play around with this instead of just using a USB cam.
The hardware assembly of the camera and it’s connection to the Jetson Nano was easy enough. It comes with a nice stand, which may come in handy. There was one odd thing however – the connector for the ribbon cable on the Jetson’s end is smaller than on the camera. The instructions said to use the wider cable, but that was wider than the connector. I ended up using the smaller cable, which fit perfectly.
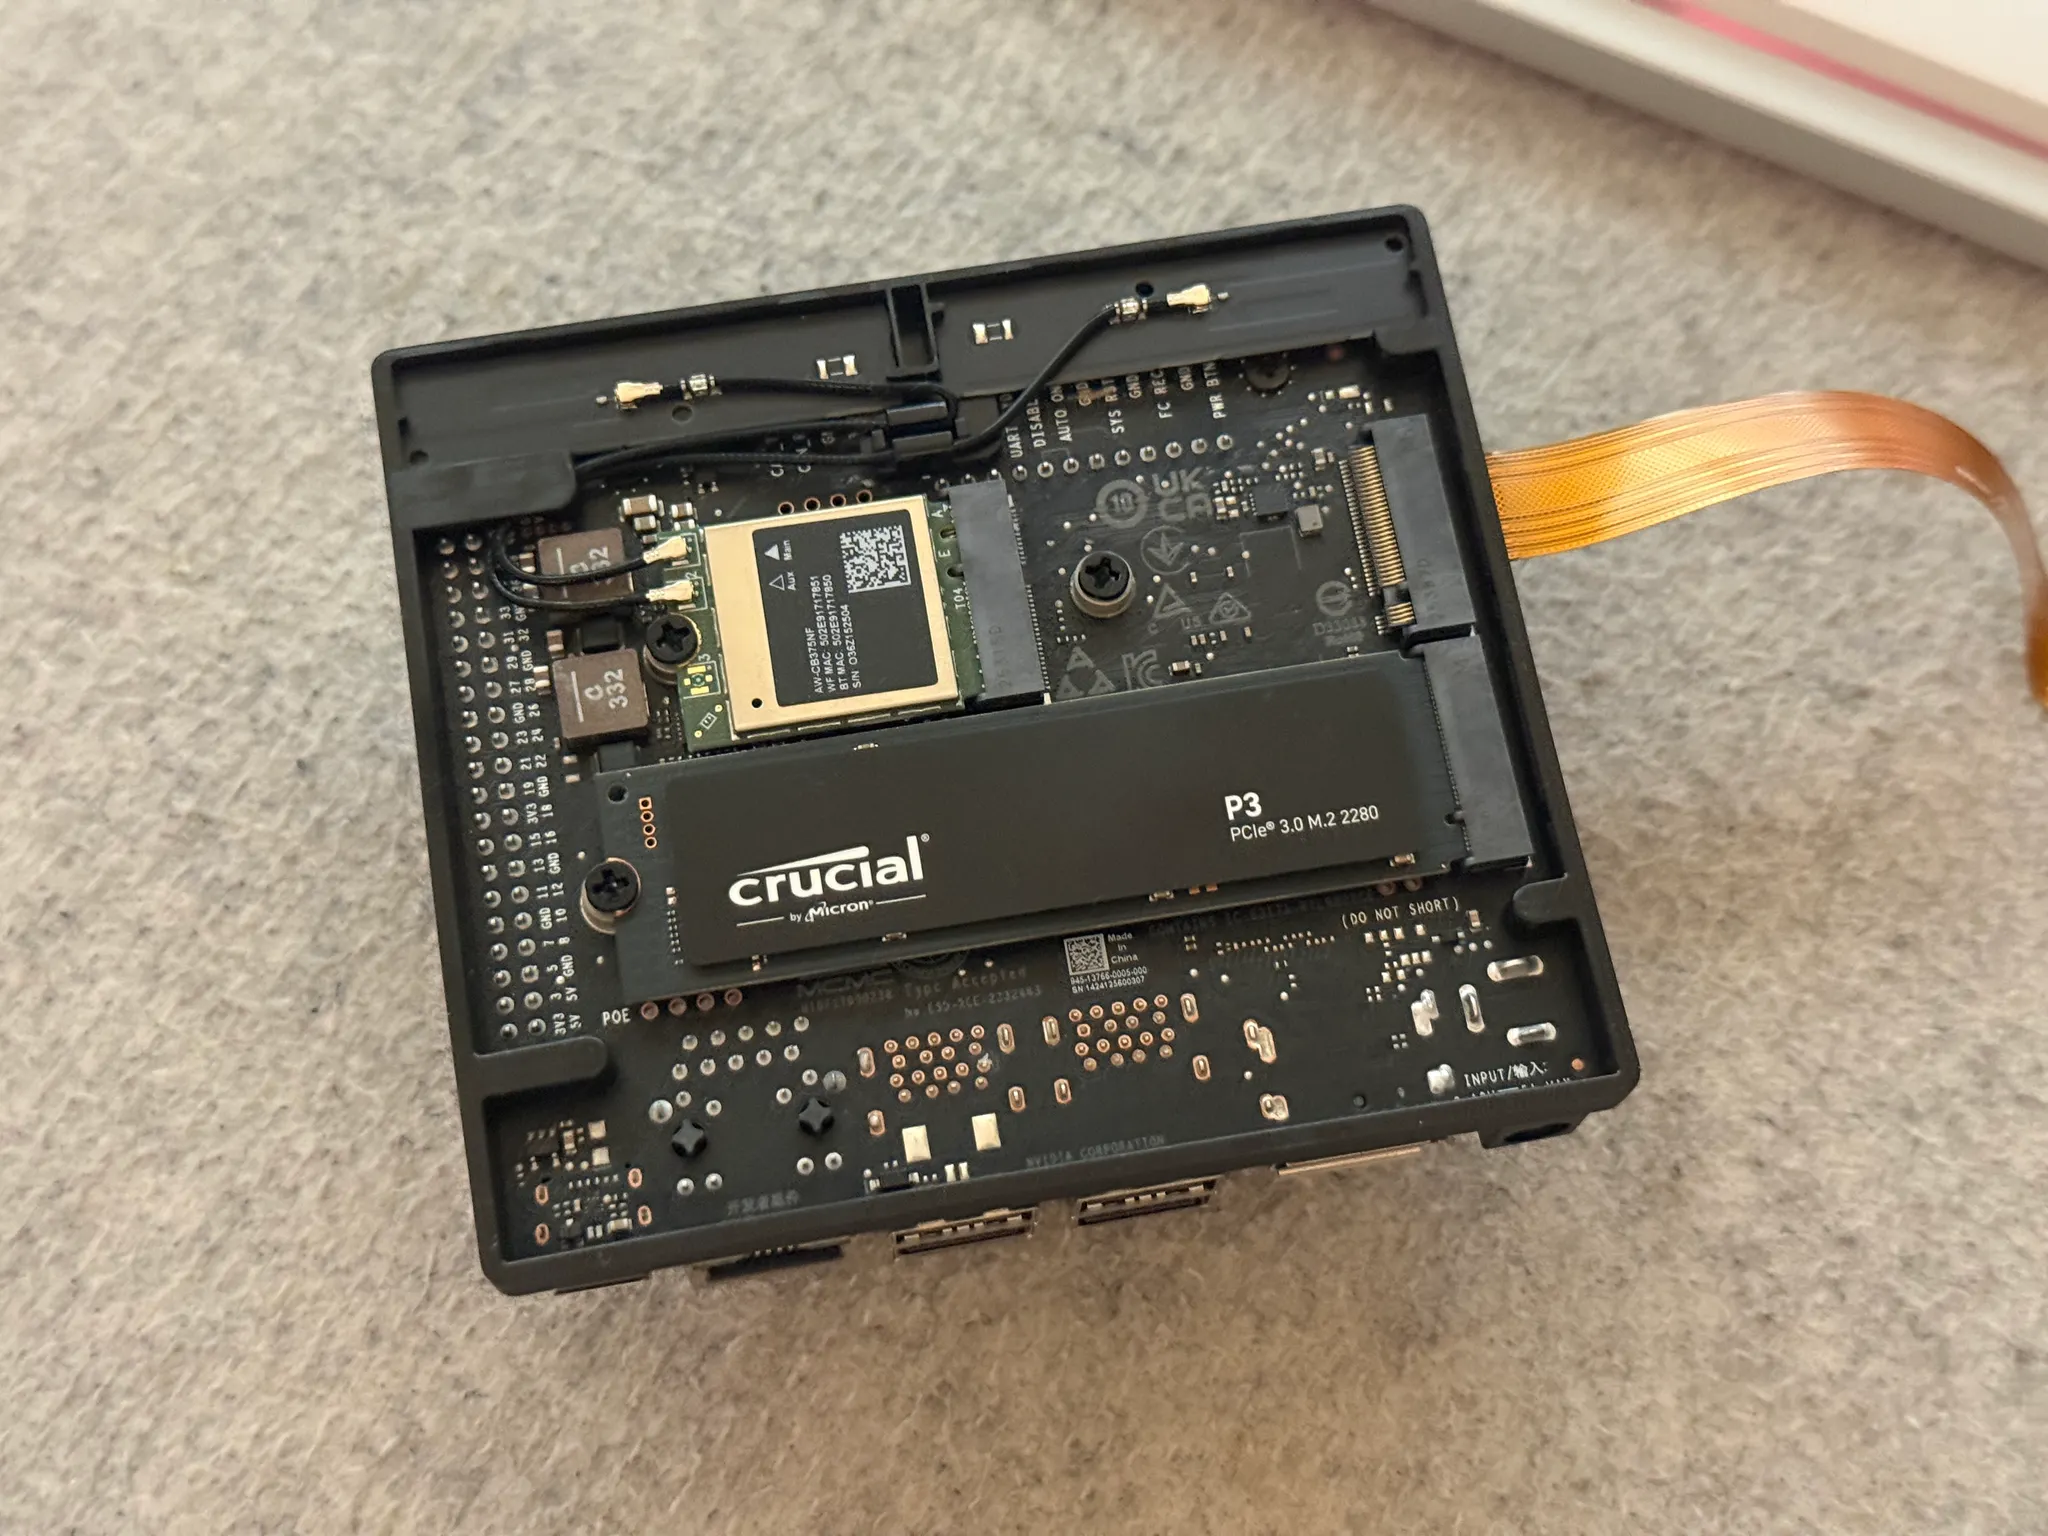
SSD
Because the Jetson does not come with any storage device, I also needed an SSD. The Jetson can also work with an SD card, but I much preferred the SSD for the increased size, speed and reliability.
As of writing this, there is a RAM and SSD shortage, so I basically went with something I could get my hands within a short time and with still reasonable pricing. So I landed on the Crucial P3 SDD with 500GB size.
The Jetson offers two M.2 slots for NVMe device on it’s underside and the installation was as easy as one would expect.
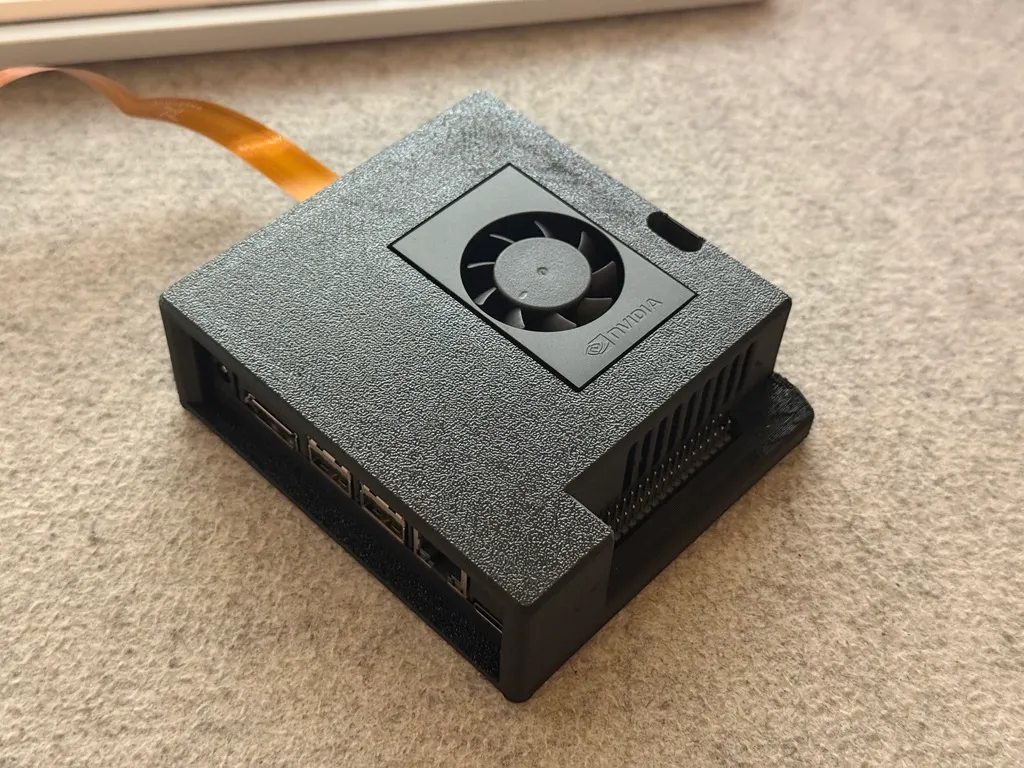
3D printed case
To give some protection to the Jetson I also 3D printed a case for it. I quickly found this model on Printables: https://www.printables.com/model/555369-nvidia-jetson-orin-nano-developers-kit-case
Because I’ve read some comments about concerns regarding heat when printing in PLA, I decided to print the case in PETG. It came out pretty clean, nicely protects the Jetson and makes it look clean and tidy. I’ve also added some stick-on rubber feet to keep it from sliding around.
Software setup
Operating system
The first thing to install is obviously the operating system. As per the NVIDIA documentation (https://www.jetson-ai-lab.com/initial_setup_jon_sdkm.html) I used the SDK manager method. I needed this method, because I had no SD card. The SDK manager method is required when installing Jetson Linux directly onto an SSD for the Jetson.
The NVIDIA SDK manager requires an x86 host PC with Ubuntu Linux 20.04 or 22.04 to run. Because I daily drive a Macbook with Apple Silicon chip, I installed Ubuntu 22.04 desktop on an old intel based notebook I had laying around.
wget https://developer.download.nvidia.com/compute/cuda/repos/ubuntu2204/x86_64/cuda-keyring_1.1-1_all.deb
sudo dpkg -i cuda-keyring_1.1-1_all.deb
sudo apt-get update
sudo apt-get -y install sdkmanager
Once installed, I launched the software with this command:
sdkmanagerTo flash the Jetson, it needed to be put into recovery mode. To do so, two specific header pins on the Jetson need to be bridged when powering it on.
After connecting the Jetson in recovery mode to the host notebook via an USB-C cable, the Jetson got detected in SDK manager right away.
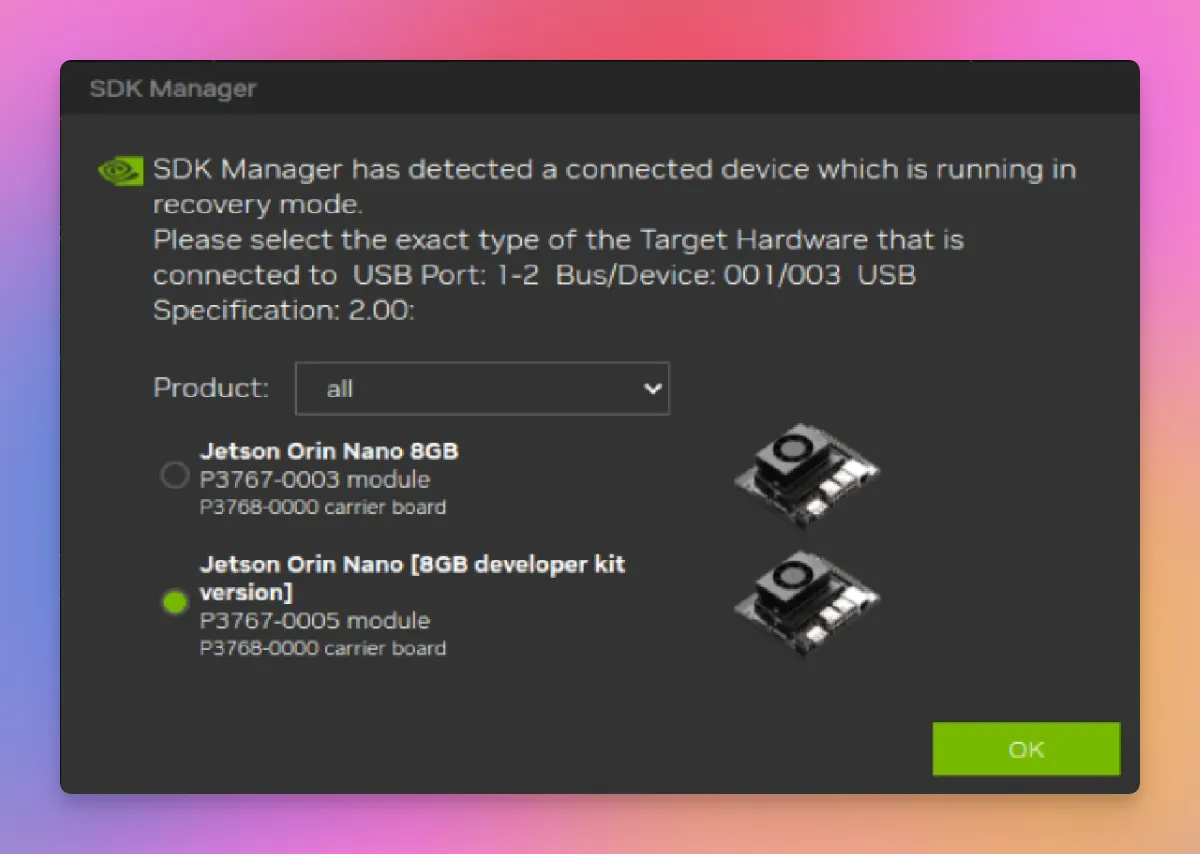
Following the guide linked above, I configured install settings and installed Jetson Linux on the device. Here are some screenshots of the process.
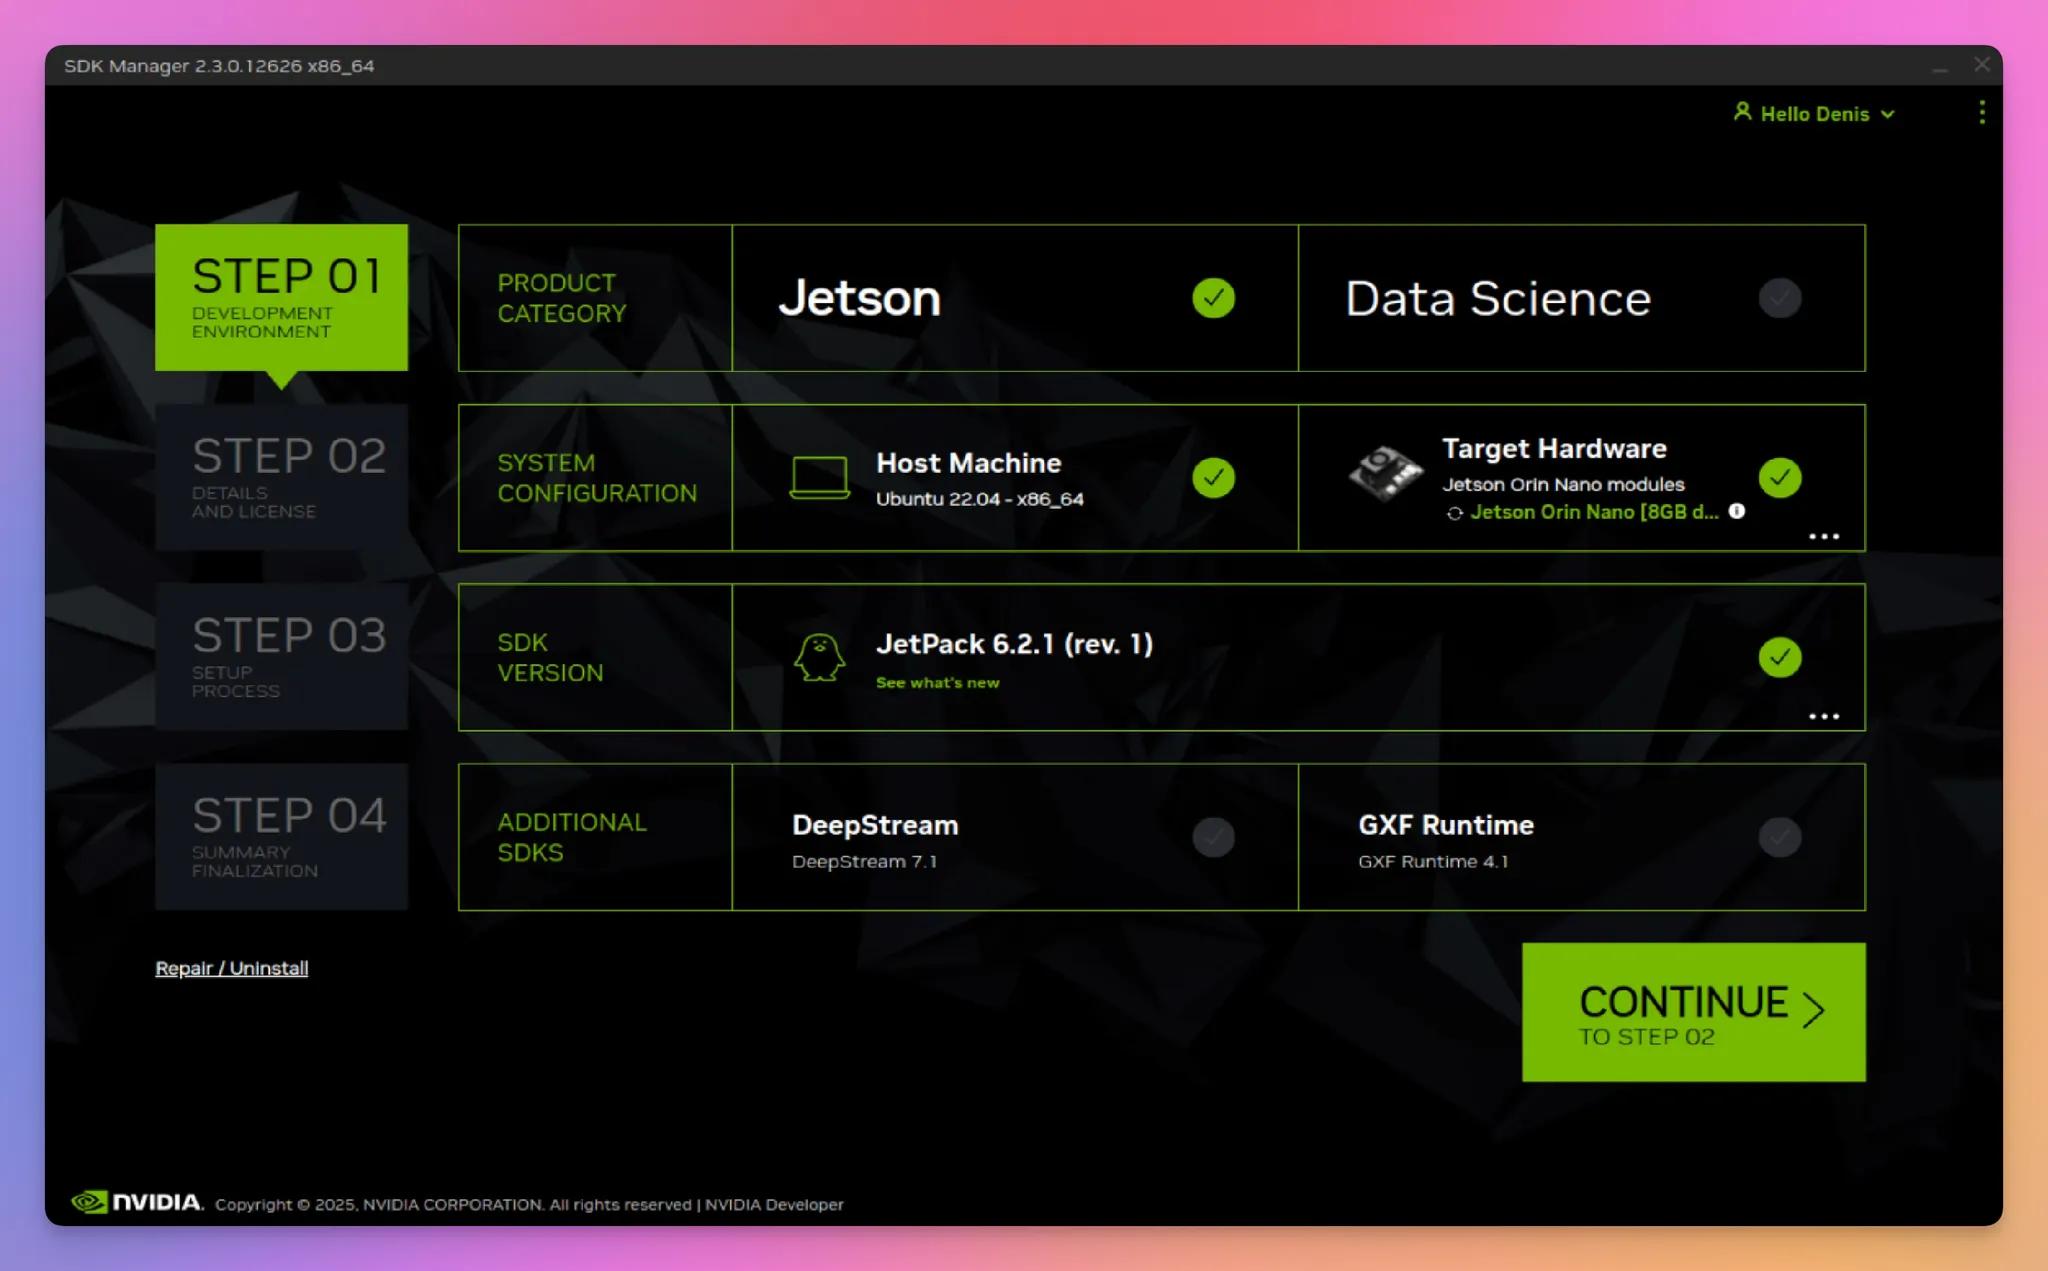
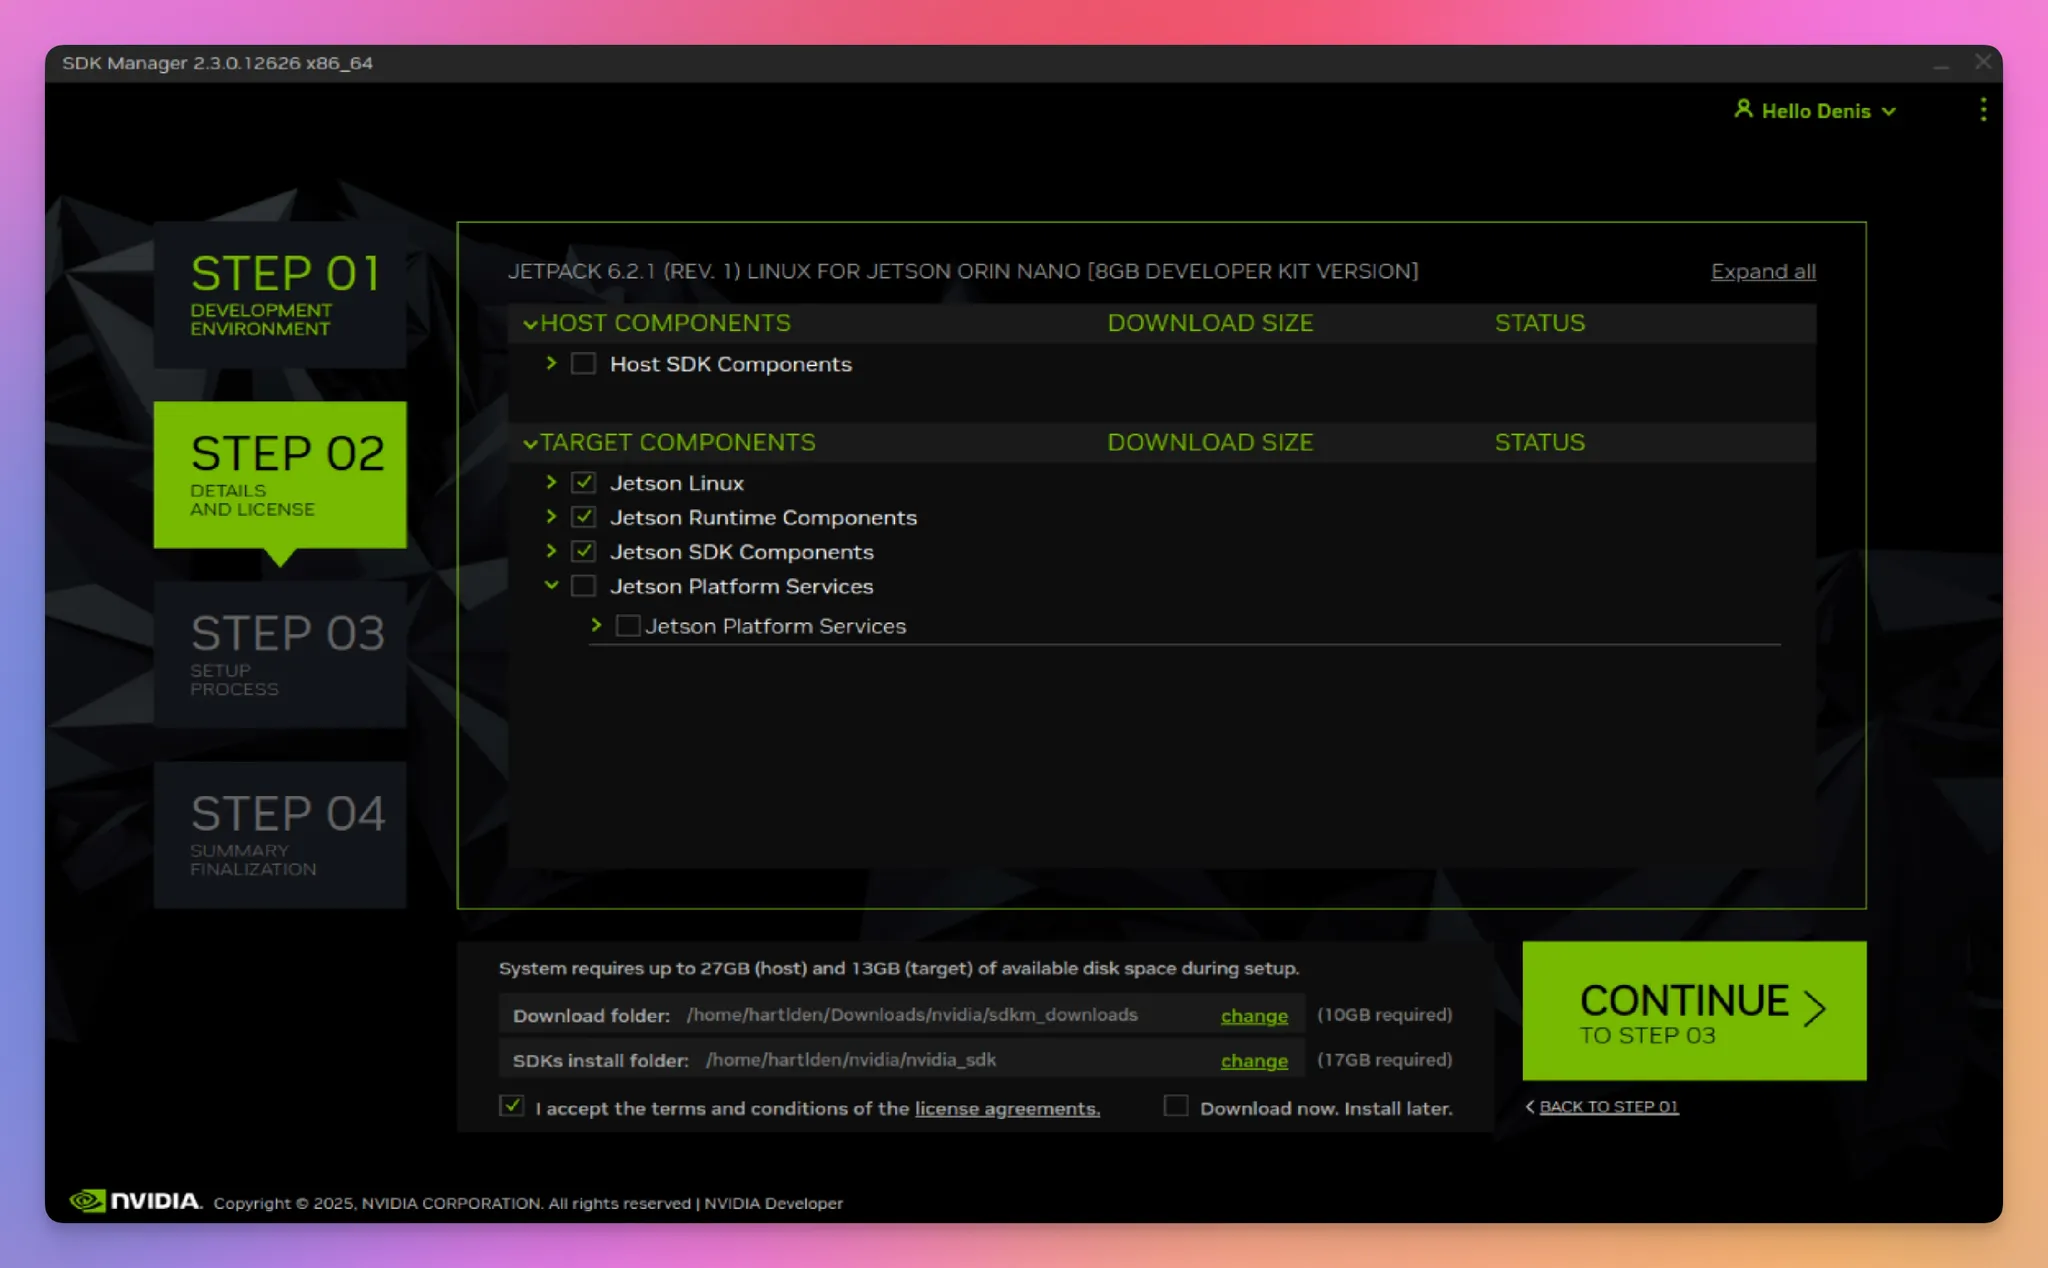
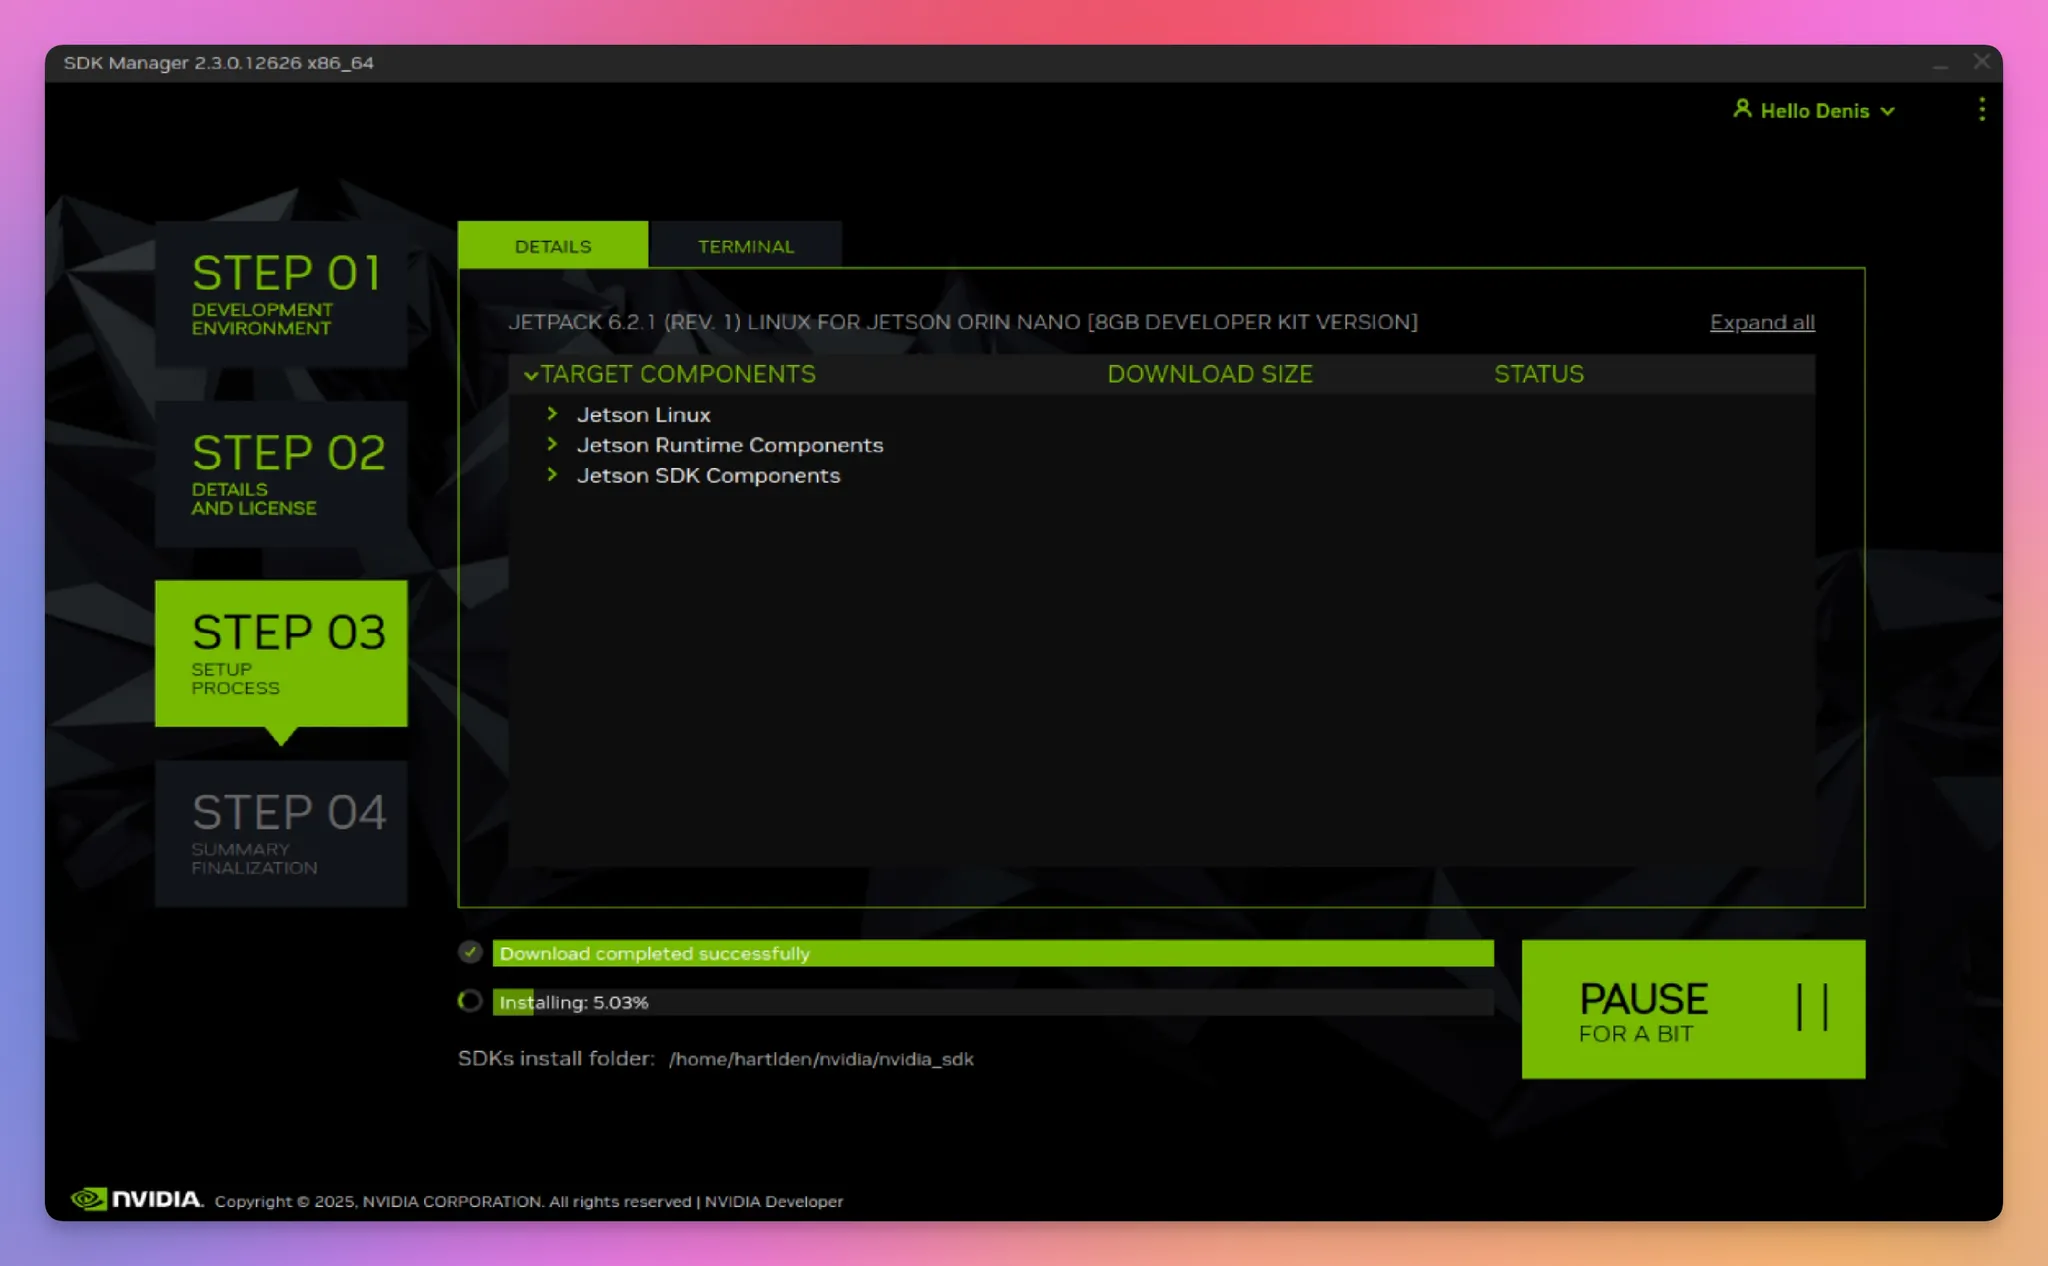
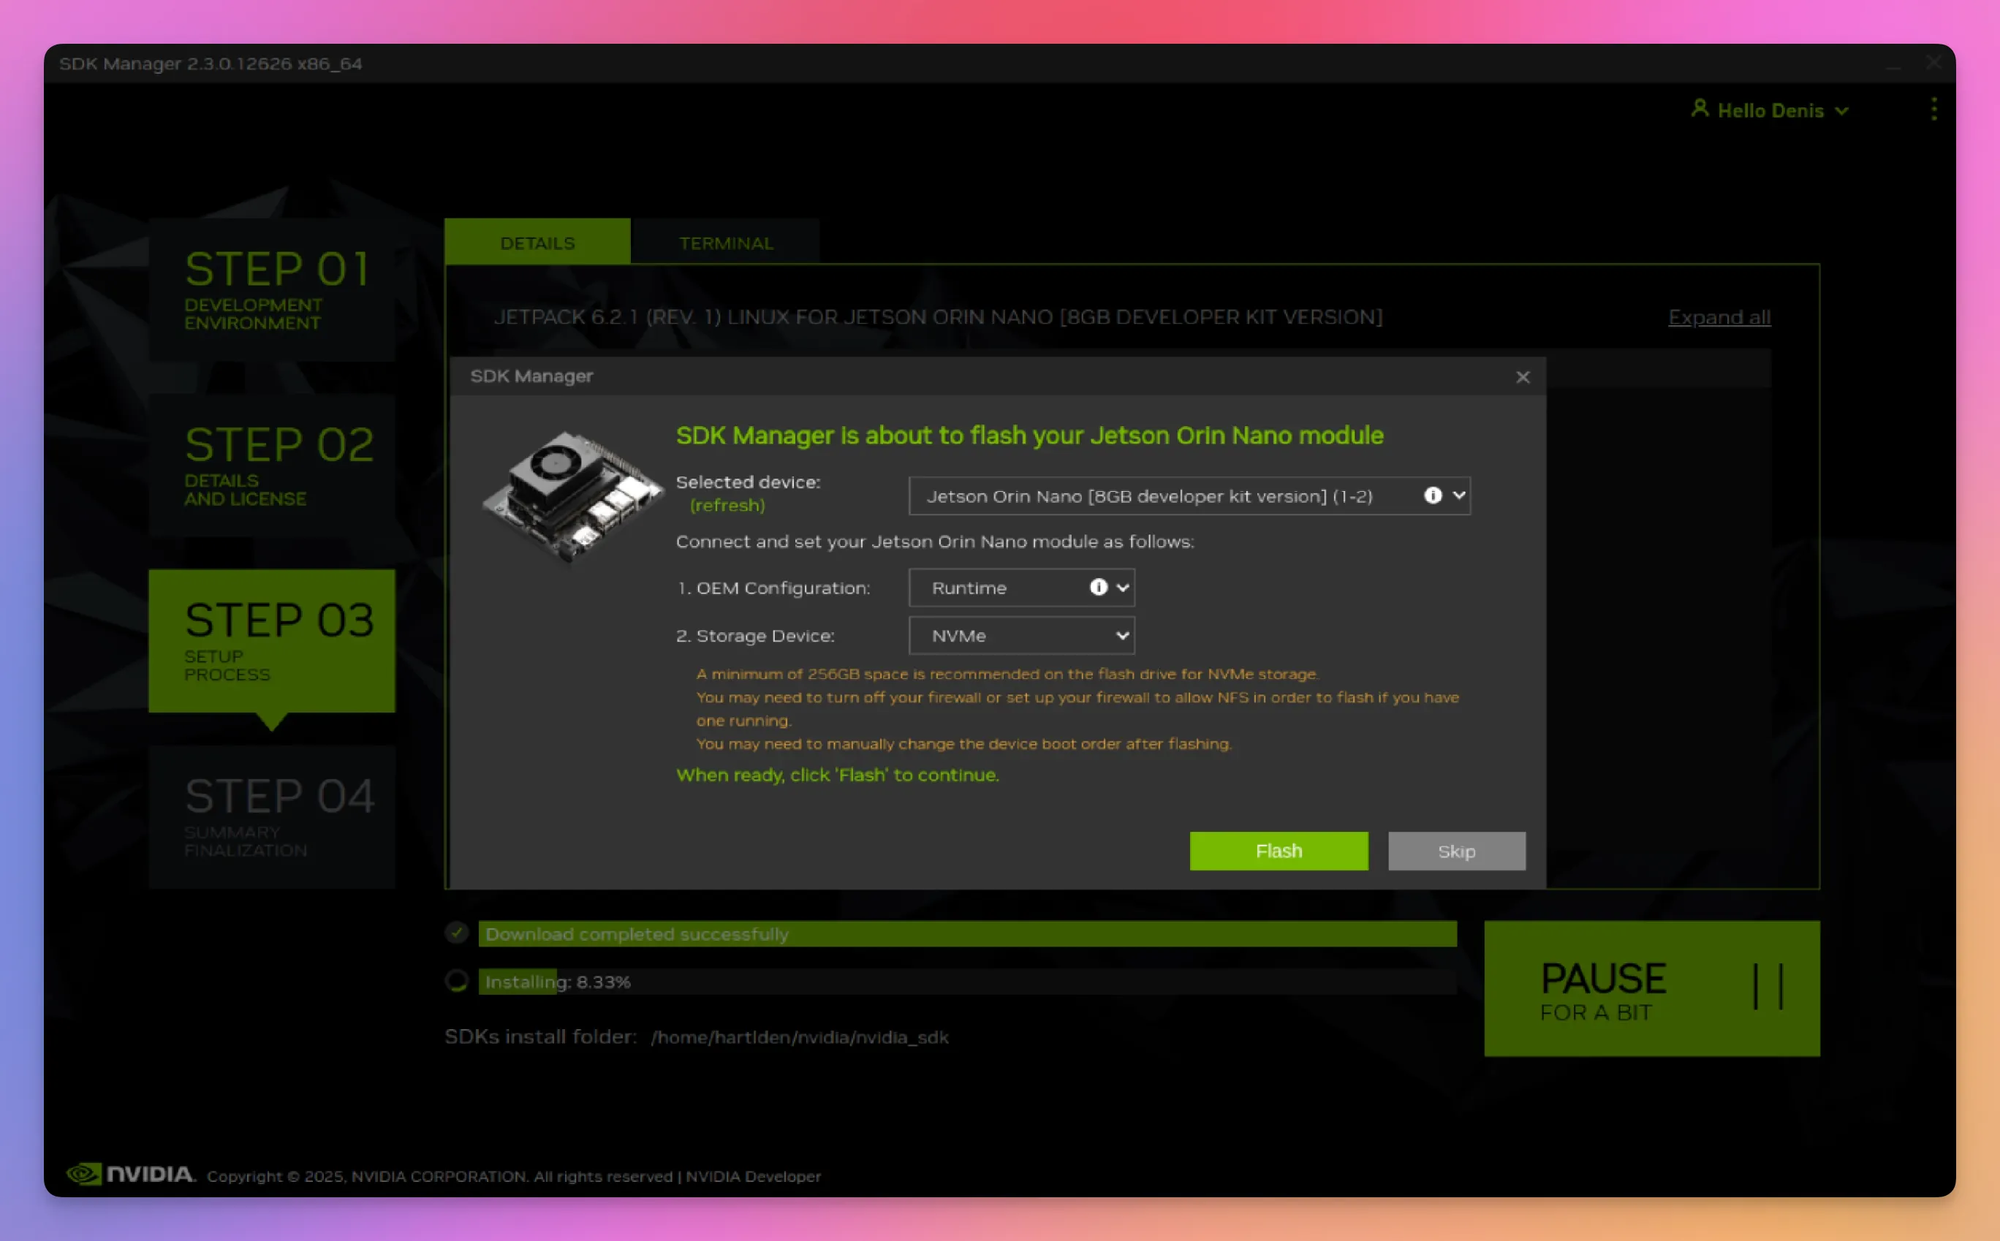
Some screenshots of the flashing process
After the initial flash I connected the Jetson to peripherals and an screen and rebooted it. Some console output appeared, but it got stuck on this line: A start job is running for End-user configuration after initial OEM installation
After some reading online I rebooted the Jetson once again. From this point on I did not get any output anymore, even after multiple retries. I decided to retry the flash using the SDK manager multiple times, but never got the Jetson to boot or display anything. At this point I already spent a couple of hours on the install and was a bit frustrated to be honest.
Upon doing some research I found this video explaining a manual flash method for the Jetson by the Youtube channel JetsonHacks: https://www.youtube.com/watch?v=q4fGac-nrTI Using this method, I got the Jetson to finally boot with proper display output, but with an outdated Jetson Linux and Jetpack version.
After that, I decided to give the SDK manager one final shot, so I re-flashed the Jetson with the SDK manager to get up-to-date software. And while I was not expecting it, this actually worked. My guess is that the manual flashing method also correctly writes the QSPI memory of the Jetson, which contains the bootloader and other important information. I think that the SDK manager somehow skips this. I don’t understand why NVIDIA would exclude this from the SDK manager method. After all, the documentation explicitly names the SDK manager method for installing the Jetson directly.
After the Jetson finally booted, I manually performed the OS setup steps and added Jetson Runtime and SDK components via the NVIDIA Jetson SDK manager. It does this via an SSH connection to the Jetson.
Remote Access
With the Jetson finally booting, I also wanted to find a way for remote access to the Jetson. I am planning on doing some projects involving AI vision capabilities, so I wanted to have the option to view the output directly.
My first thought was to use a VNC connection for this. I found this guide on how to configure the Vino VNC server: https://developer.nvidia.com/embedded/learn/tutorials/vnc-setup
I found this very interesting, because it would allow me to connect to the Jetson directly via the built in “Screen Sharing” utility of my Macbook. I tried this, but the connection was VERY slow, completely unusable. So I needed an alternative.
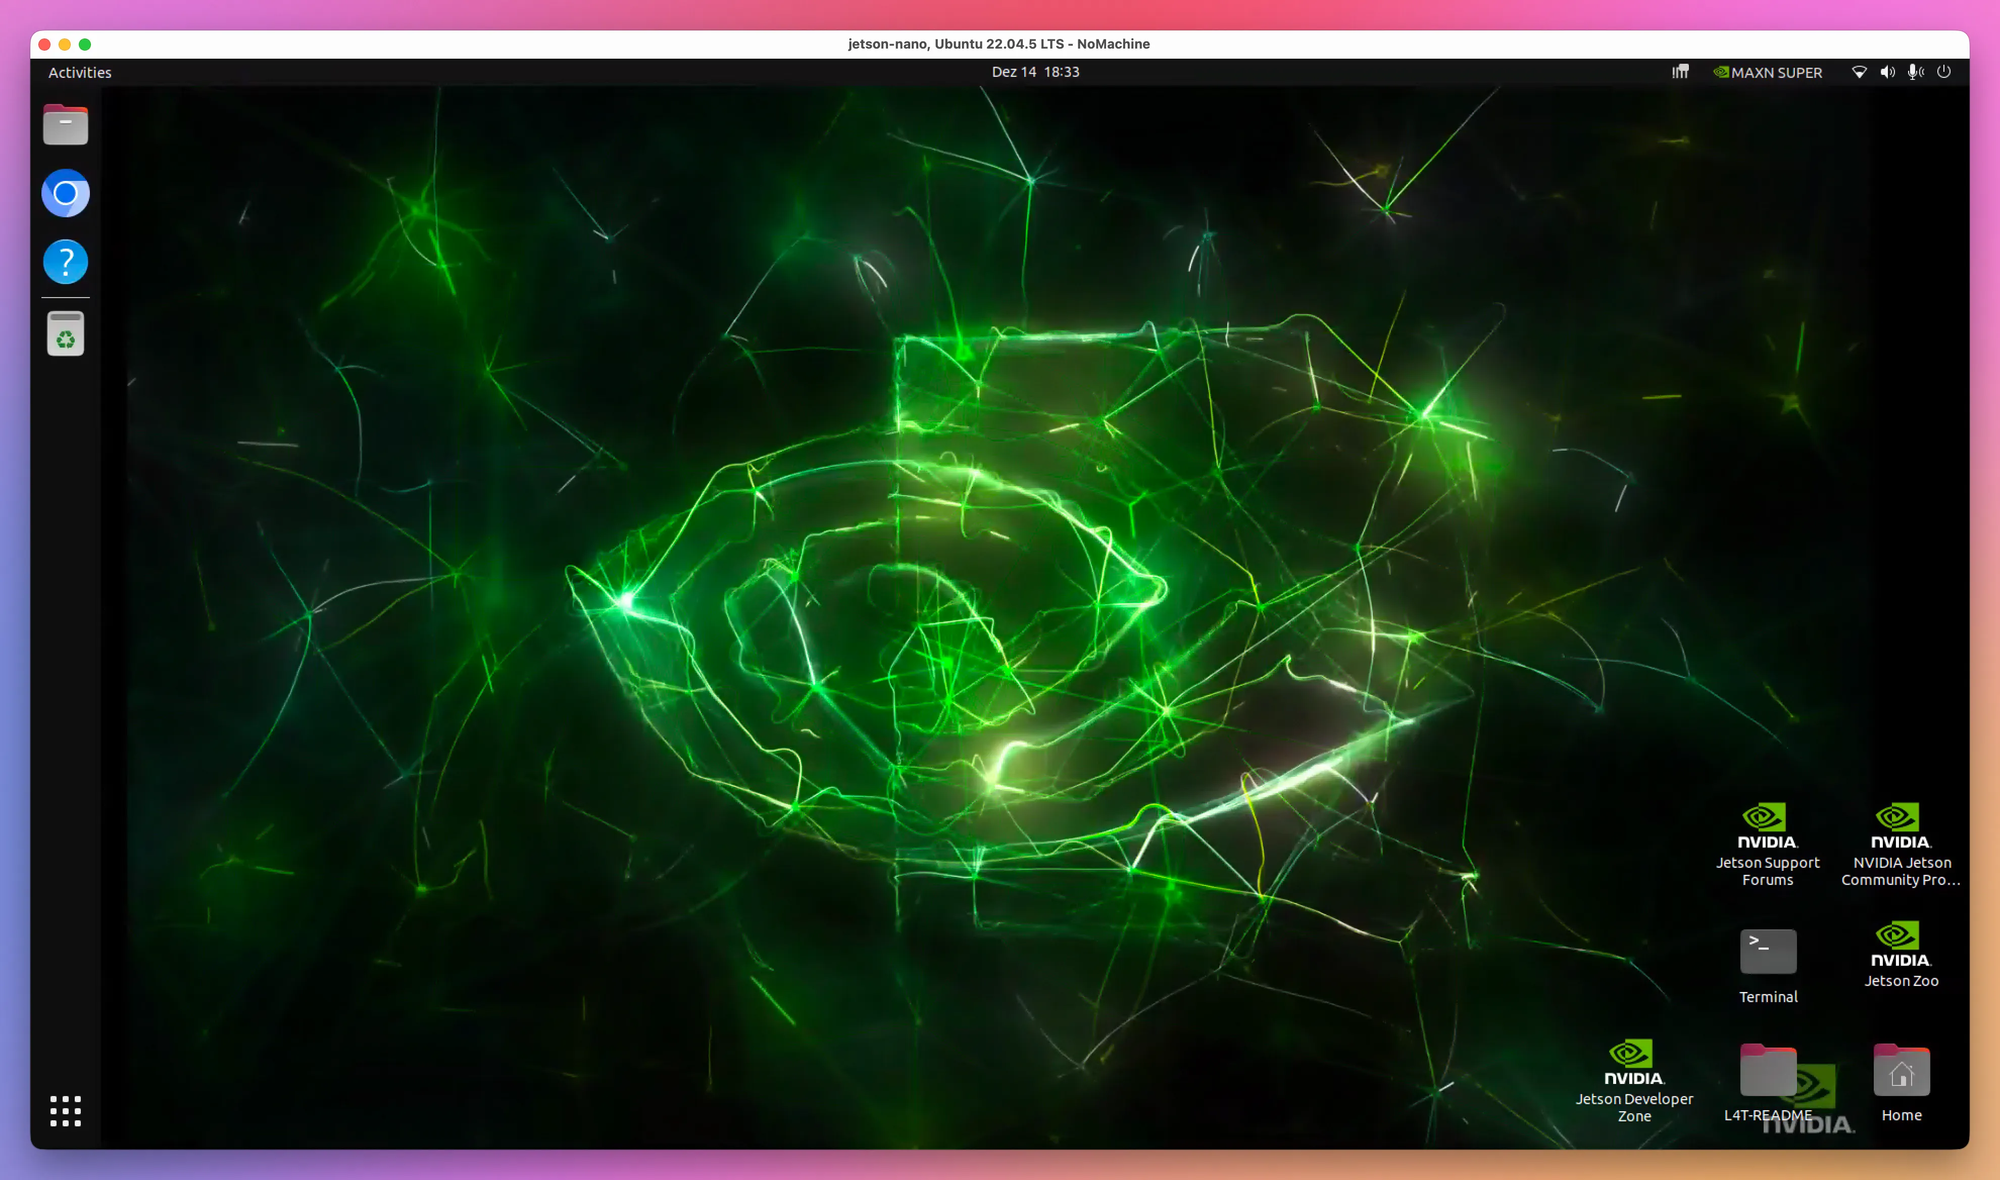
After some research I found NoMachine: https://jetsonhacks.com/2023/12/03/nomachine-jetson-remote-desktop/
As the guide I found is quite old, I used these commands for the installation:
wget https://web9001.nomachine.com/download/9.2/Arm/nomachine_9.2.18_3_arm64.deb
sudo dpkg -i nomachine_9.2.18_3_arm64.deb
NoMachine is available on Mac via Homebrew:
brew install nomachineAfter launching NoMachine on my Macbook, the Jetson instantly got discovered and I was able to connect to it right away.
Headless configuration for the Jetson
The remote connection is useful, but at this point the Jetson still needed a monitor connected for the graphical interface to work. Not ideal for my idea of using the Jetson remotely and headless.
I found this post about headless configuration for the Jetson and followed it: https://forums.developer.nvidia.com/t/what-is-the-best-way-to-control-the-jetson-orin-gui-remotely/239615/4
After this, I was able to correctly run the Jetson remotely, connect to it via NoMachine, but still have the GUI usable and functioning.
Camera
For the initial setup, the final piece of the puzzle was the camera. The first projects I want to play around do involve some vision capabilities, so I needed this to work.
First I had to configure the 24pin header on the Jetson correctly (see https://www.youtube.com/watch?v=gJPIJ3yxME0).
cd /opt/nvidia/jetson-io
sudo python jetson-io.py
This opens the Jetson Expansion Header tool.
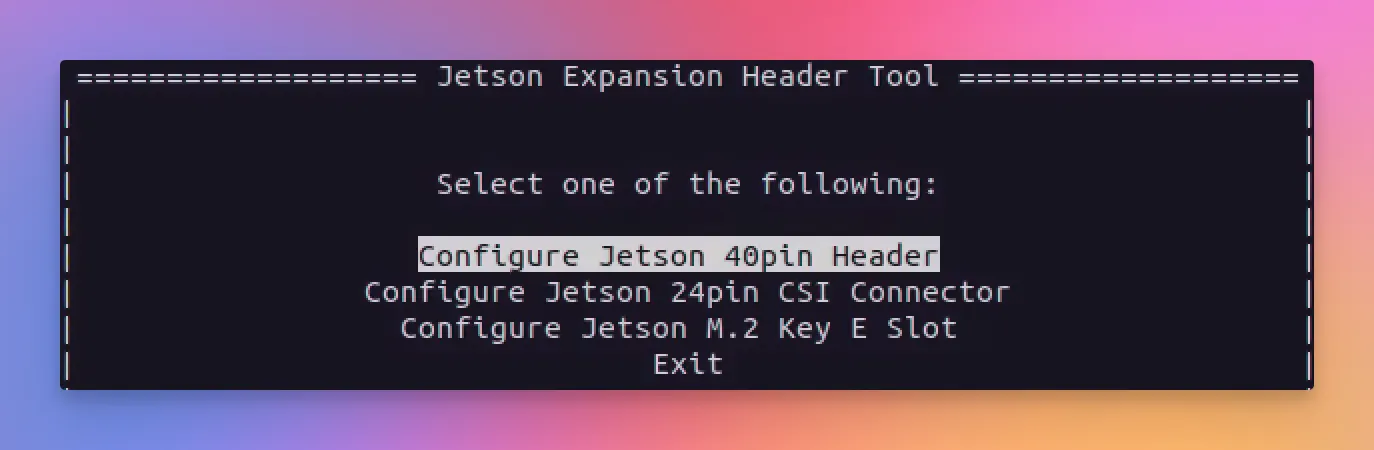
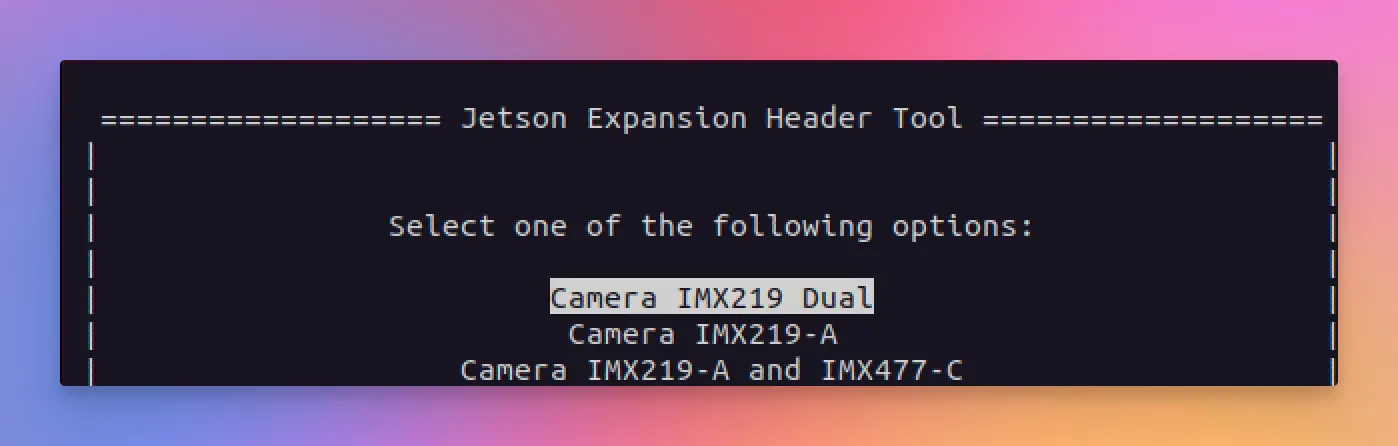
From there I configured the header for dual IMX219 use, which matches the model of the camera I got.
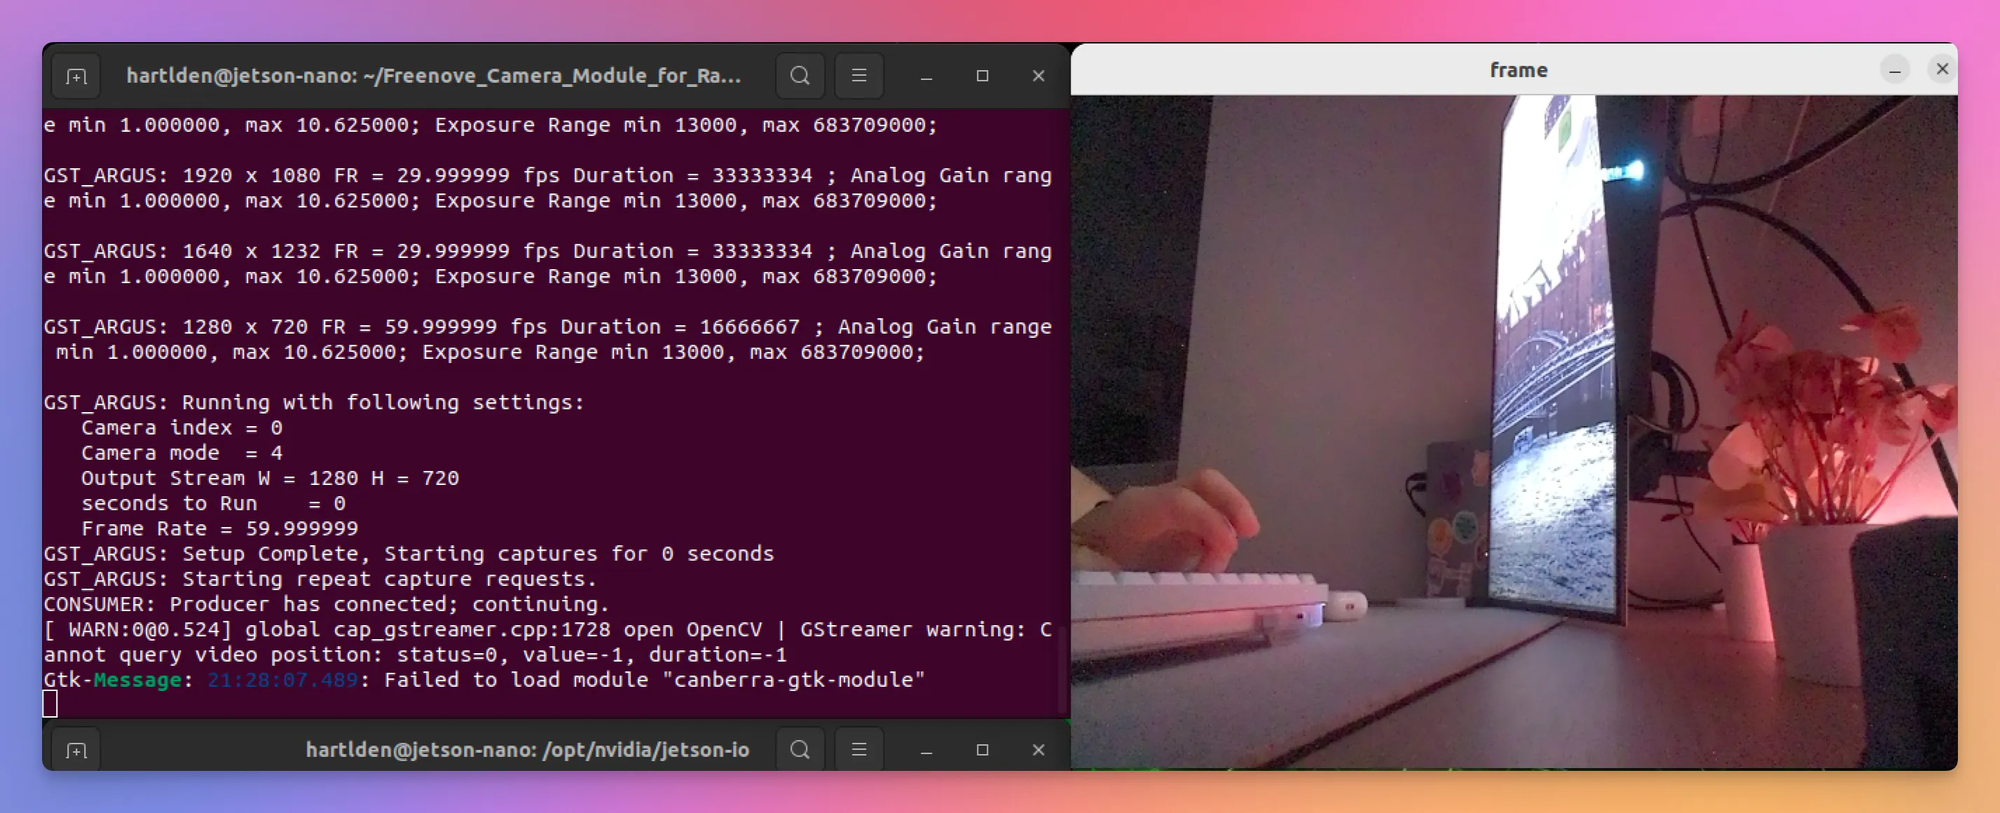
After configuring the headers and rebooting, I was able to test the camera using a test script the manufacturer of the camera I bought provides. Initially, this test failed. This was because the dummy display adapter for headless connection does not support the hardware encoding needed, so for now I connected a screen back to the Jetson. With the screen connected, the camera finally worked.
Final results
Setting up NVIDIA Jetson Orin Nano was an rollercoaster so far. So many ups and downs throughout this experience, but in the end it was very interesting, fun and I already learned quite a bit. But, to be fair, there have been some moments where I was very frustrated.
With the initial setup done, I can now go ahead and focus on getting into the topics I wanted to explore in the first place, and I am very excited.
I have ordered a DisplayPort dummy connector to get around the camera display issue, but other than that I am very happy with the setup now.
Do you also own a NVIDIA Jetson? If so, how was your first experience with it? I am looking forward to hear your thoughts in the comments. ❤️
If you like what you’ve read, I’d really appreciate it if you share this article 🔥
Until next time! 👋
Additional resources
- NVIDIA Jetson Orin Nano Super Developer Kit: https://www.nvidia.com/de-de/autonomous-machines/embedded-systems/jetson-orin/nano-super-developer-kit/
- NVIDIA Jetson SDK manager setup guide: https://www.jetson-ai-lab.com/initial_setup_jon_sdkm.html
- JetsonHacks Youtube Video for manual Jetson flash: https://www.youtube.com/watch?v=q4fGac-nrTI
- JetsonHacks Youtube Video for camera configuration: https://www.youtube.com/watch?v=gJPIJ3yxME0
- NoMachine installation guide: https://jetsonhacks.com/2023/12/03/nomachine-jetson-remote-desktop/